We use cookies on koa.com to help improve your experience by remembering your preferences and repeat visits, troubleshoot how the site operates, and learn more about how koa.com is performing. By using this site, you consent to the use of all the cookies. Learn more about cookies in our privacy policy.
Newton / Des Moines East KOA Journey Blog
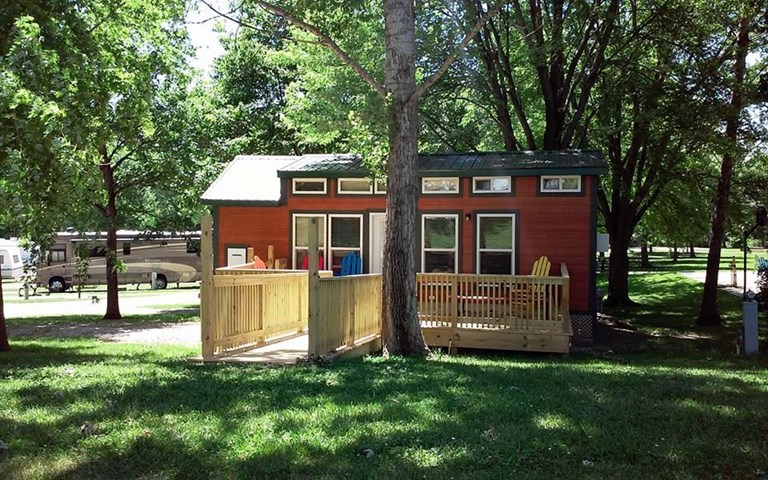
Only 30 min E of Des Moines, IA, Newton KOA is the perfect overnight stop after a long day's drive
KOA Journey campgrounds are the perfect oases after a day on the road. Whether it’s along the way or a quick getaway, they’ve got you covered. Located near the highways and byways of North America with long Pull-thru RV Sites, they deliver convenience to the traveling camper. Pull in, ease back and take a load off.
KOA Journey campgrounds are the perfect oases after a day on the road. Whether it’s along the way or a quick getaway, they’ve got you covered. Located near the highways and byways of North America with long Pull-thru RV Sites, they deliver convenience to the traveling camper. Pull in, ease back and take a load off.
KOA Journeys Feature:
Pull-through RV Sites with 50-amp service
Premium Tent Sites
Well lit after hours check-in service
Directions
From I-80: Turn north at Exit 168 onto Iowa Speedway Dr. Travel about 3/4 mile and look for the "KOA" sign on left. Take a hard left in front of the lighted Newton KOA sign between Barney's towing and a church. Go 1/4 mile down our lane into our KOA. Check in at the office and you will be assigned a site. Relax and enjoy!
Do not rely on GPS. You may be routed needlessly through Newton.GPS: N41.684937, W93.013722
Ultimate Guide to Building a Campfire | How to Build a Campf
Reposted from the KOA blog:
Ultimate Guide to Building a Campfire
After a day spent outside, nothing is as comforting as a warm, crackling campfire.
Campfires are the heart of a campsite. People seem to be naturally drawn to them. Whether we come to warm our hands, roast some s’mores, sing a few songs or share stories, a campfire gathers people close together.
However, building the perfect campfire isn’t as simple as tossing a few logs in a pit and lighting a match. Creating a good campfire is an art, and like any art, it requires patience, experience, good supplies and the right knowledge.
Different Types of Campfires
In many ways, a fire is a fire — they keep you warm, help you cook and create a cozy atmosphere. However, not all fires are created equal. Various types and styles of campfires will provide different effects, including heat output, cooking potential and length of burn.
Here are five of the most common campfire types — experiment with a few different ones on your next camping trip.
1. Tepee or Cone
One of the classic fire shapes, the tepee or cone fire gets its name from the shelter it resembles.
A tepee fire has a circular base with a wide diameter, letting in plenty of oxygen. To build a tepee fire, begin by laying down a large bundle of tinder. Next, use small pieces of kindling to form a tepee shape above the kindling. As the fire grows, continue to add larger sticks to the tepee structure.
One of the benefits of a tepee fire is its easy maintenance — simply lean more sticks against the frame to feed the fire as it burns. Because a tepee fire burns through wood fast, it is generally used to warm up quickly or for small cooking tasks such as boiling water.
If you want to use a tepee fire to cook a meal, wait until the wood burns through, and the cone collapses. Set a small pan or pot on the coal bed and feed the fire with small sticks or twigs to keep it going.
2. Log Cabin
For a fire that is long-lasting and easy to maintain, try a log cabin arrangement.
Begin by stacking wood as if you were building a cabin — place two pieces of wood parallel on the bottom, then stack two on top, perpendicular. Repeat the process until your fire reaches the desired height, then place tinder and kindling in the center square and ignite.
Use your broader pieces of wood for the bottom and add thinner, lighter pieces for the top. You can also experiment with tapering the shape as it grows taller, creating more of a pyramid shape than a cabin.
As they burn, the logs fall in on one another, constantly feeding new wood to the coals. Because of this, a log cabin fire tends to burn more slowly than a tepee, making it a good choice for the evenings when you want to spend a few hours around a crackling blaze.
3. Platform or Upside-Down Pyramid
Similar to the log cabin type, the platform fire was designed to cook food. The main difference between the two styles is that the logs of a platform fire are stacked closer together, and you start the fire at the top instead of the bottom.
Because you start a fire at the top of the wood, the fire burns down the logs instead of up. This creates a solid, flat platform of hot coals, perfect for cooking — you can set pots or pans directly on the coals, and the fire will sustain itself as it burns.
To build a platform campfire, start by laying three or more pieces of firewood on the ground. Place three or more on top, perpendicular to the first layer. Keep adding wood until the fire is at least three levels high, and then set tinder and kindling on top of the platform.
4. Star
When you are low on wood supplies, the star fire may be the perfect solution. It uses whole, un-split logs and burns them slowly at the ends to create a long-lasting and efficient fire.
To begin, gather four or five logs of any length. Build a small tepee fire with kindling, and drag the logs around it — one end should face the fire, and the other should lead away from it, like the points of a star or the spokes of a wheel. The tepee fire in the center will ignite the ends of the logs. As they burn, push the logs closer to the center to replace what has already been consumed.
5. Lean-To
If you’ve camped in breezy conditions, you have experienced the frustration of trying to start or maintain a fire in high winds— it can feel as though you are constantly battling the elements, trying to sustain a blaze long enough to cook food and keep warm.
Next time you are in the great outdoors during high winds, try building a lean-to fire. Using its own wood as a windbreak, a lean-to protects your flames from frustrating gusts.
For the simplest style of a lean-to fire, find or place a thick log on the ground and lay your tinder against it, away from the wind. Lean your kindling against the log, so it covers the tinder — once you ignite the tinder, the kindling will catch and begin slowly burning the log. As the fire grows, gradually add larger sticks to build it up, and add another full-sized log to the fire when it is big enough.
Materials You Will Need for Building a Campfire
Before you leave for a camping trip, make sure you pack or will have access to the supplies below. Also, always check with the park or campground’s policies before gathering your own materials at your campsite — some locations don’t permit campers to forage for tinder, kindling or firewood to protect the environment.
1. Tinder
Tinder is the smallest, easiest-to-catch materials used in building a campfire. Common types of tinder include:
Cardboard strips or pieces
Wadded up paper
Wood chips or shavings
Dryer lint
Pine needles
Dry leaves or grass
Candle wax
Commercial fire starters, sticks or bricks
You can usually gather tinder around your campsite. However, if conditions have been wet or you are worried about tinder not being readily available, you can always bring some tinder with you to make the fire-starting process easier.
2. Kindling
Kindling is larger than tinder but smaller than firewood. The most common types of kindling are small twigs or branches.
Make sure your kindling is thin — if it is too thick, it won’t catch and will extinguish your small fire.
3. Firewood
Firewood is the fuel of a fire, and the most important element of good firewood is dryness. For the best campfires, you want firewood that is completely dry — it will light easily and maintain a good flame.
Most campers don’t have a preference when gathering or purchasing firewood — during a camping trip, you take what is readily available. However, below are some of the common types of firewood, so you know the distinctions between each species if you have to choose:
Oak: Oak is one of the most popular types of firewood. It is a dense and slow-burning wood that produces a hot, minimal-sparking fire.
Beech: While beech firewood can burn hot and long, it must be properly seasoned for at least a year — beech wood is heavy and dense, so it needs to dry a long time before use.
Maple: Maple trees are dense and hard, and maple firewood is known for producing a long-burning campfire with high heat output.
Birch: Birch is a softer type of firewood that tends to burn quickly. However, it also gives off plenty of heat, creating a cheerful, bright campfire.
Ash: Lightweight and easy to split, ash firewood tends to burn hot, slow and steady.
Cherry or Black Cherry: With a lovely aroma and low amounts of smoke, cherry is a favorite wood for cooking, especially for smoking meats such as pork, beef, chicken and fish.
Check your location’s policies carefully before attempting to gather firewood — many campgrounds sell firewood at the campground store, so you don’t have to worry about packing or gathering firewood once you have set up camp.
4. Spark or Flame Source
The final thing you need is a spark or flame source.
Knowing how to start a fire with just a few sticks is a valuable survival skill. However, unless you have practiced the technique and are confident in your ability, consider packing matches or a lighter.
Flint and steel, matches, lighters and other fire starters can reliably produce a spark or flame to get your fire started.
How to Build a Campfire
Once you’ve gathered your supplies, you’re ready to begin building your campfire.
Keep in mind that a fire needs three things to succeed: good fuel, a spark source and proper oxygen flow — even if you have great firewood and a lighter, if the pieces of wood are too close together, the flame won’t get enough oxygen and will quickly die out.
Follow these steps to build an impressive campfire on your next trip:
1. Choose a Safe Spot
The first step in building a campfire is finding a safe spot.
All KOA campground campsites have a designated fire pit or fire ring, but you should still check the surrounding area to make sure there are no dead branches overhead. Clear away anything close to the fire pit that might catch fire from a stray ember or spark, and avoid starting a fire near dry grasses or brush.
In backcountry locations where fires are allowed, use an existing fire ring if possible, and only build a new ring in emergencies. Ideally, the base of your fire ring or pit should be mineral soil, gravel or sand — intense heat can sterilize healthy soil, so choose your site carefully. Make sure to clean out the fire ring of any debris before you leave the campsite.
2. Create a Tinder Bed
Once you’ve found a safe spot, set down a layer or bundle of tinder.
Make sure you use enough tinder — if you lay down too little, the flame will quickly die out before catching the kindling on fire. Wind or wetness could extinguish a small flame, so protect your tinder from any wind or soggy surfaces.
3. Add the Kindling
Next, stack kindling on top of the tinder.
The exact way that you lay your tinder will depend on the type of fire you are building. For example, if you are building a platform fire, you will need to build up a stack of firewood before setting your tinder and kindling on top. Alternately, for a lean-to fire, setting kindling below and around your tinder can help a spark catch.
Make sure your tinder is small enough to nurture a small flame and dry enough to easily catch fire.
4. Build Your Fire
Now, build the frame for the rest of your fire.
Think about what kind of fire you need — are you looking for a steady cooking fire, or are you wanting a hot, slow-burning fire that will keep you warm all evening?
Some fires, like platforms, stars or lean-tos, require the larger pieces of firewood to be present from the beginning. However, other types of campfires are built gradually as the flame grows.
For example, with a tepee fire, begin by arranging the kindling in a tepee formation around the bed of tinder. Continue adding larger and larger pieces of kindling as the fire grows, working your way up to firewood.
5. Celebrate!
Congratulate yourself on building a beautiful campfire, and get excited about the delicious meal or warm blaze you are about to enjoy. Next step, lighting your campfire!
How to Start a Campfire
Once you’ve constructed your campfire layout, the next step is to ignite it.
If conditions are favorable and you’ve built a solid fire, you should be able to start it by simply lighting the tinder with matches or a lighter. However, if your campsite is too windy or humid, you might experience some trouble.
It’s better to prepare for a difficult fire-starting process than be caught by surprise — consider packing some waterproof matches or extra tinder that is sure to catch, like bits of broken candle wax. Once a lighter or spark has caught the tinder on fire, blow gently at the base to provide oxygen. This increases the intensity of the blaze, and it helps the flame ignite the larger pieces of kindling or firewood.
Have extra tinder and kindling ready and on-hand to feed the flame once you get a spark, and keep adding tinder and kindling until the larger pieces of firewood catch. You may need to gently fan or blow on the fire depending on which type of campfire you have built to make sure it receives enough air flow and oxygen.
How to Start a Campfire With Wet Wood
When you’re camping, you never need a fire more than when cool and damp out. Sometimes, the cheerful glow of a campfire is just what you need to warm up your campsite. However, starting a campfire in wet conditions is notoriously frustrating, even for seasoned campfire-starting experts.
Try these tips if you’re stuck in the rain on your next camping trip:
Look for sticky materials: In wet conditions, look for spruce, firs, pines or other needle-bearing trees. Their wood has sticky, highly flammable sap, which makes them a great choice for starting a fire. Evergreens are also known for keeping out the rain — look for dry wood underneath their canopies.
Split wood and kindling: Split pieces of wood to help them catch faster. Instead of using whole sticks and twigs for kindling, snap or cut them in half — the exposed inner, drier wood will light easier than the bark exterior.
Peel off the bark: Bark is designed to protect a plant from fire, and most barks aren’t flammable. Carve, peel or tear away the bark from your kindling to expose dry wood underneath the surface.
Light low from the windward side: Heat rises, and fire climbs — start your fire low, and the heat from the fire will dry out the wood as it climbs. Also try lighting your fire from the windward side to let the flames move through your sticks, setting them on fire faster and more efficiently.
Adjust the shape: If you are having a difficult time keeping a fire going, opt for a taller shape — many fires are doomed from the start because the layout of the wood is too flat. Choosing another style like the tepee allows the heat from the fire to efficiently dry out the wood, prolonging your fire and producing more heat.
Consider bringing along some fire helpers as a last resort — fire bricks, dryer lint or cotton balls soaked in petroleum jelly are guaranteed to catch fire, making the process less time-consuming.
How to Build the Best Campfire for Cooking
Not all fires are great for cooking. Try one of these cooking fire types, arranged by what you want to cook and available supplies:
Cooking with pots and pans: Platform fires are intended for cooking over with pots or pans. If you have brought these materials with you on your trip, try building a platform fire for the best results.
Cooking with sticks: If you plan to cook your food using sticks or skewers, a lean-to or tepee fire is your best bet — they are easy to build and burn hot, providing you with a fast meal.
Cooking with foil: For cooking hobo packs or other foods that can go directly into the coals, any fire can work. However, wait until it has produced a solid base of coals for the best results.
While it’s possible to cook something using any heat source, save yourself time and energy by building one of these fires specifically designed for fast, efficient meal preparation.
Remember Fire Safety
An unattended fire can damage both the environment and your supplies — stay safe by following these fire safety tips:
Stick to designated spots: Unless you are camping in the backcountry and are experiencing an emergency, only light campfires in designated fire pits or fire rings.
Put it out before you sleep: Once you are done with your fire, extinguish it safely and thoroughly. Never leave your fire or campsite without making sure your fire is completely put out.
Keep water or dirt on-hand: Keep a bucket of water, dirt or sand on-hand to quickly extinguish a fire in an emergency.
On average, humans cause nearly 62,000 fires across the United States each year — with the right precautions, you can make sure you keep your campsite safe.
Test Out Your Campfire Skills at a KOA Campsite
With a little practice, you will become a campfire-building master in no time. Practice your skills in some of the country’s most beautiful locations when you visit a KOA campground.
At every KOA campground, you will have access to clean bathrooms, hot water, laundry facilities, a KOA store and on-site fire features like fire pits and fire rings. Test our your campfire building skills at a KOA campsite — reserve your campsite today.
Instead of just being one of those campers who crumples up some newspapers and uses one of those stick lighters to start your campfire, impress your friends and fellow campers with your ability to build the perfect campfire with a single match. Follow these tips and you will look and feel like a campfire-starting pro in no time!
First and foremost, be aware of the fire danger level in your area. Updates are released daily by the service tasked with protecting the forestland you’re camping in, and signs with the day’s fire level are usually posted throughout national forests, especially fire danger-prone areas like the Black Hills National Forest or Yosemite National Park. As Smokey the Bear says, only you can prevent forest fires.
Once you’ve confirmed the area is safe for a fire, the first thing you need to do is choose your fire location. Always use a designated fire area when they are available. These areas are meant to hold fires and are a safer option than the bare ground. However, if no designated area is available for your perfect campfire, you will have to prepare the ground first. The name of the game here is bare ground. Get rid of every stray leaf, branch, twig and any other combustible item you can find. Do this in a location that’s also as far from overhanging branches and other plant material as possible.
Once your location is cleared, it’s time to build your base. You want a base made of dirt that’s about three to four inches thick on which to construct your fire. This dirt base offers insulation from the ground and any flammable bits that you may have overlooked. (Good neighbor tip: Make sure you’re in a location that this type of digging is allowed in. Don’t start digging up nature preserves or anything of the like!)
The next thing you need to do is gather your fire-building materials. You’ll need three different types of materials: tinder, kindling, and fuel. Tinder (and I don’t mean the dating app) is small and dry material that’s used to initially ignite your perfect campfire. Things like pine needles, fluffed cotton, birch bark, and dry grass work great. (If rain is in the forecast or recently fell, bring your own tinder from home. You need dry tinder to start a fire and it can be hard to find when the woods are damp.)
Kindling is the next type of wood used in the fire building process. It’s the bridge between the ignited tinder and the larger fuel wood that’s going to sustain your blaze. Small twigs and branches are the most common types of kindling to get this puppy started!
You’ll want to gather your fuel wood next. A mix of larger branches and logs will contribute towards a long and lasting campfire. Collect more of each type of wood than you think you’ll need–fuel wood can run out fast, and you don’t want to have to scramble for fuel to keep your fire going!
Now it’s time to lay your fire. There are several different methods for laying a fire, but the most common (and easiest to master) is the teepee fire. Build a small teepee (like in the photo below) from the kindling you collected in your fire area. You’ll then pile the tinder up near the base of the teepee. Don’t be hasty when you lay your fire, because this is the most important step. A properly laid fire will make the lighting process a piece of cake. (Only using that one match like we talked about!)
Once everything is in place, strike your match and place it to your tinder bundle. If everything is dry, the tinder bundle will burst into flames. Some gentle blowing can help encourage things along, but don’t put your face too close or blow so hard you blow out the fire!
Continue to add your extra kindling to the tinder bundle. This will help the flames to grow and your teepee to catch fire. As the blaze grows, start to add your fuel. Once the fire is burning strong, you can slowly add your biggest logs to the fire. Just don’t be too hasty–if you add them too soon, you’ll risk smothering the fire.
After a night of marshmallow roasting and campfire stories, putting out your perfect campfire is just as important as getting it started. Some sort of container to hold a decent amount of water is the ideal way to douse your fire for good. If you’re car camping or have some extra room in your pack, a small fire extinguisher is a great back-up plan to have.
While it may seem like a good option, smothering the fire in dirt is not a good idea. Embers can stay hot for a long time if you smother a fire, and that’s just asking for trouble.
Once you have your container of water, use a sprinkling method to put out the fire and cool the embers. Don’t just flood the fire with the entire container. That just makes a mess and usually isn’t enough to put the fire out. As you sprinkle water, stir the ashes to accelerate the cooling process. Repeat the process until a hand held close to the ashes (but not in them) feels no heat.
Spread the ashes out and return your fire area (if you made your own) to as natural a state as you possibly can. This is a great courtesy to nature and the next campers who use your campsite.
Always remember safety and use common sense, and you’ll be building the perfect campfire in no time at all! Looking to test out your campfire building? Stay at one of KOA’s great locations!
Share This:
Oh My, There's Nothing Here!
That doesn't mean this area has to always be empty. When you start reviewing camping options, your history will display here to help compare sites and find the best stay. You will be able to share your stay information with friends or family and save it for a later time if you have a KOA Account.
Make checkout easy by booking all your reservations at once. Add your sites from different campgrounds into your shopping cart* and then choose checkout.
Your site was successfully added to your shopping cart.
As a reminder, sites saved in your shopping cart are not guaranteed, and are sold on a first-come, first-served basis. If you are interested in a specific campground or site, or availability is limited, we suggest you checkout promptly.